
New article
Recently updated
Managing forms on a register

Who is this article for?
Full Users who want guidance on managing Forms in Assurance.
Full User type is required. You will either need to be the Person Responsible or have Access Rights to update Forms.
After a Form has been created on a Register, the Person Responsible or Full User with Update Rights to the Register can access various features in Assurance to help manage it on a day-to-day basis.
1. Editing a form
Selecting on Edit (pencil with notepad icon) will take you to the full edit screen:
You will now be able to edit any field in the Form.
You can also edit fields without going into the full edit screen. When you hover your mouse over a field, a pencil icon will appear if you are able to edit the field in the Details section:
2. Viewing changes
The View Changes feature keeps track of changes made to fields in a Form, and lets you view a timeline of when these changes were made and by who.
To view changes on a Form, select on View Changes (clock icon):
When View Changes is active, the button will be highlighted grey and new icons will appear on screen next to the field names:
These icons indicate that a change has been made to this field since it was created (if there is no icon then the field has not been changed since the Form was created).
The circle indicates what user made the latest change, and next to that is a label indicating when the change was made. If you click on the icon next to a field name, a popup will appear that shows a timeline of all the changes made to that field:
To hide the changes again, simply select View Changes (clock icon) again to switch it off.
3. Bookmarking a form
You can Bookmark your Forms to appear in the Bookmarks Snapshot. To do this, select on the More Action menu (three dots icon) in the Details section of the Form you would like to Bookmark and select Bookmark:
The Form will now display in the Bookmarks Snapshot on your Home Dashboard:
To remove the Bookmark, simply select on Remove Bookmark:
4. Creating a .zip
If you need to download all of the attachments from a Form, you can do so by selecting the Create a Zip option from the More Action menu (three dots icon) on the Form:
Assurance will then inform you that it will extract all of the attachments, as well as a PDF of the Form and send you an email which contains the link to download the zip file.
Assurance will then send you an email with a link to download the zip file, the link will expire after 24 hours.
You will then be asked to log into Assurance and then your download will begin.
You are also able to Forward this email onto other Assurance users, however they will need Read Rights to the Register in order to download the zip.
5. Exporting to PDF
You can email and share the details of a Form with team members who are not Assurance Users by selecting the Export to PDF option from the More Action menu (three dots icon) within the Details tab of the Form:
Run the PDF report which you can then save to your folders and attach to an email.
6. Configuring and exporting to PDF
This feature allows you to choose what to add when you Export to PDF:
A popup will appear for you to select which options you would like to add to the PDF:
7. Viewing a form workflow
To view the current workflow for a Form, select on the More Action menu (three dots icon) on the Details tab of the Form that you want, and select View Workflow:
This will bring up a modal with the workflow of the Form. You can select on a stages name to see who are be the Approvers for that stage:
You can also export the workflow out to a PDF by selecting on the blue Export to PDF button, at the top of the modal.
8. Sending back to submitter
If a User with Edit Rights to a Form (such as Person Responsible or an Approver) submitted through the Public Link finds an issue with the information provided, they are able to send the Form back to the person who submitted it and have them amend the form and resubmit.
Please note
This requires the submitter to have provided an email address when submitting, if not then this feature is unavailable.
Select on Send Back to Submitter from the More Action menu (three dots icon):
After selecting on this option, a Send Back to Submitter popup modal will appear prompting you to enter the reason that you are sending the Form back. You will also be informed that if this Form is in a later stage, then it will be moved back to the first stage as part of this process. This means that it will need to be moved through the approvals workflow again to get back to its current stage. If the Form is still in the first stage, then this will not be an issue. Enter in the reason then select the blue Next button:
You will then be shown a preview of the email that will be sent to the submitter. When you are ready to send the email, select on the blue Confirm button. Select the Back button to make further changes:
After sending the Form back to the submitter, the Form will be placed in a Read Only state:
This means that the only way that the Form can be amended is through the link provided in the email that was sent to the submitter. If you would like to amend the form yourself, you can access the link by hovering over the Sent Back to Submitter status, select Copy and paste the link into your browser:
Note that once amendments are submitted using the URL, either by you or the submitter, the submitter access will be cancelled, and the Form will be resubmitted for approval.
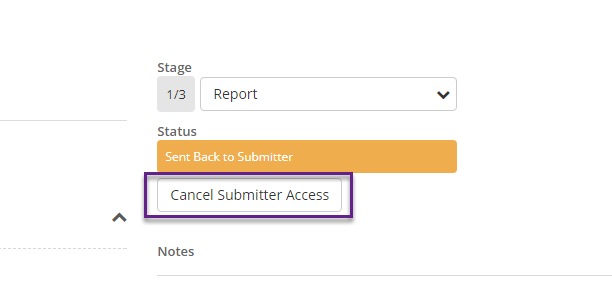
If you want to cancel submitter access early, this can be done by selecting the Cancel Submitter Access button on the right side of the page:
When the submitter access is cancelled, either through the button or through amendments being submitted, the Form will no longer be in Read Only mode.
9. Submiting for approval
To submit a Form for approval to move to the next stage, select the option for Submit for Approval from the More Action menu (three dots icon). If no Approvers have been set up, you will see the option to Move to Next Stage instead.
Tip
You can also use the keyboard shortcut by typing the letter 's' to initiate submission for approval.
Once this option is selected, an Approval popup modal will appear showing the Approvers for this stage, and give you the ability to add a note:
Selecting the blue Confirm button will send a notification the Approver(s) who will then need to approve to move into the next stage, or in this case, close the form by approving it in the final stage.
10. Closing a form
For a Form to be closed, and you are not an Approver for it to be closed, it needs to be sent to the Approvers first:
If there is no workflow rule for 'approval to close' and there is instead the rule, 'no approval required' in the final stage, the Form will close when you select the Close button, if you have Access Rights to Close Forms.
11. Jumping to section/table
With this feature, users can quickly jump to a section of a Form without scrolling. You can also expand a table from the top of the Form.
12. Viewing notes
In Assurance, you can add Notes to Forms on Registers. To add a note, select on Add a Note... on the right side of the screen.
This will then expand the Notes text field where you can type in your note, choose a Note Type and add an Attachment if necessary:
You can also mention other users in a note, by using the @ symbol and typing their name. This will send them an email notification with your note.
There will be a link in the email notification to the Form on the Register. The mentioned user can select on the link to open the Form.
Please note
The mentioned user must be a Full User, and must have Access Rights to view the Register or needs to be Person Responsible of the Form, to be able to open the note. Otherwise, they will receive an error when trying to access the note.